

PSU Upgrade
The original power supply of the Color Classic is a very weak thing - some are better some are not - but one thing they got all together: if you want to put additional hardware in the Color Classic you have to do something. Specially if you want to do a G3 Upgrade or even put a PCI graphics card in your Takky Upgraded Color Classic you have to add a additional power supply.
In the past there were several others who put additional power supply to their Color Classics. My way is a little different, but in the core it is the same.
In the past the most people add a 12 and a 5V PSU into their Color Classics. As you eventually mentioned in my Q+A I've put a IDE2SD adapter into my Color Classic which consumes not much of the 12V power.
Other people installed that 12V PSU only for drive the harddisk. So in that case I decided only to add a additional 5V PSU.
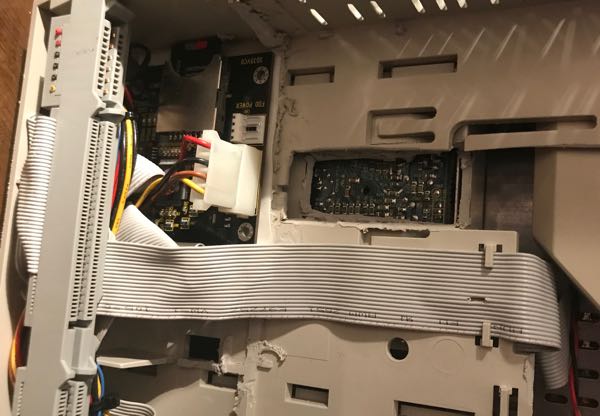
In the Picture you see the IDE2SD card already placed under the Takky Harness. It fits perfect in that place.
Other people installed that 12V PSU only for drive the harddisk. So in that case I decided only to add a additional 5V PSU.
In the Picture you see the IDE2SD card already placed under the Takky Harness. It fits perfect in that place.
The best thing about the ide2sd card is, in case of the PSU upgrade, that the whole place where only the hard drive was is now free. This space is perfect for placing an additional power supply because it fits directly to the areas where it has to be connected.
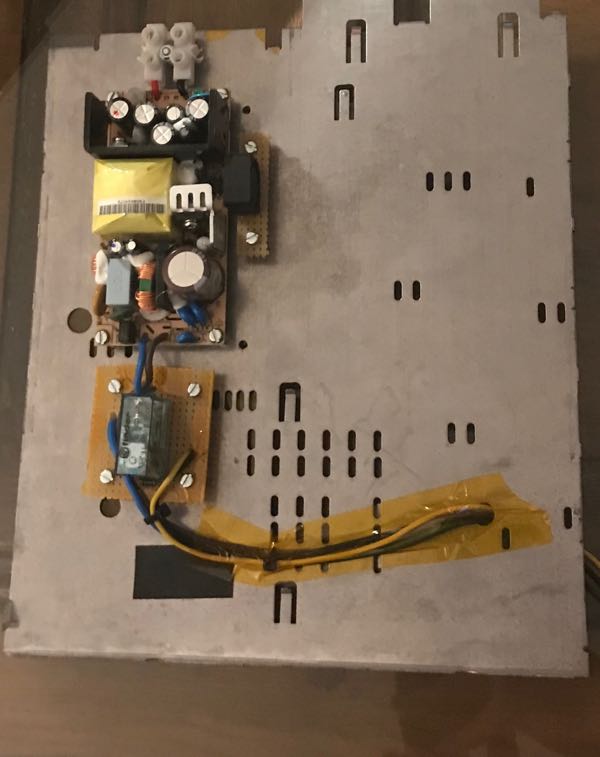
To have a good mounting I decided to fix the additional PSU on the back side of the analog board metal plate, so it slides directly into the free space of the hard drive.
To have a good mounting I decided to fix the additional PSU on the back side of the analog board metal plate, so it slides directly into the free space of the hard drive.
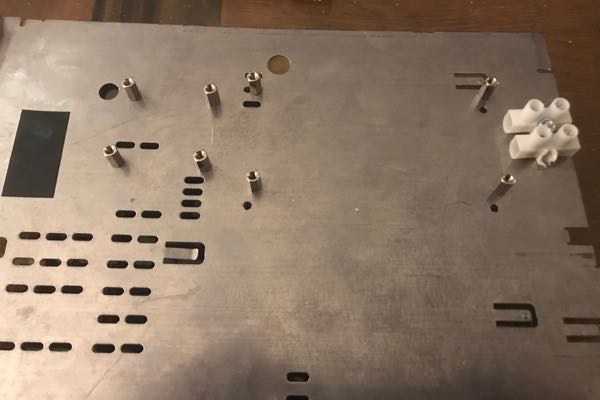
In to picture you see the mounting crews for the PSU board and for the second board which is needed for a relay. More about the relay board later…
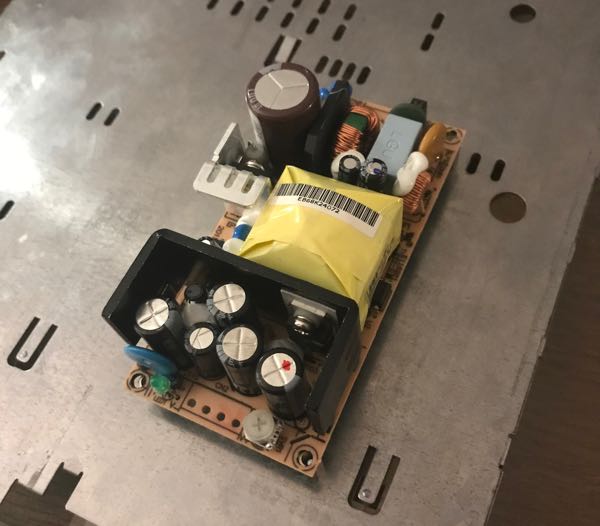
Here you see the additional PSU on the back side of the analog board plate.
The PSU is a "Mean Well EPS-45-5" - it is a 40W, 5V, 8A. That should reach for the most things you could do with your Color Classic.
The data-sheet can be found in the download section.
The PSU is a "Mean Well EPS-45-5" - it is a 40W, 5V, 8A. That should reach for the most things you could do with your Color Classic.
The data-sheet can be found in the download section.
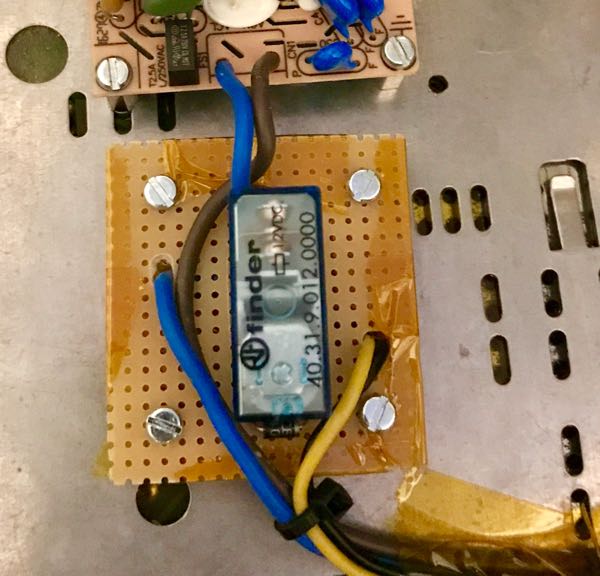
For switching on the additional PSU automatically with the startup of you Color Classic you need a relay.
Here you see that one I used - Its a "finder 40.31.9 12V". The data-sheet can be found in the download section.
Here you see that one I used - Its a "finder 40.31.9 12V". The data-sheet can be found in the download section.
Here you see, how to wire it all up. Please be aware to disconnect the 5V cables(the red ones) from the logic board connector. For the full wiring of the logic board harness please refer to the takky upgrade section.

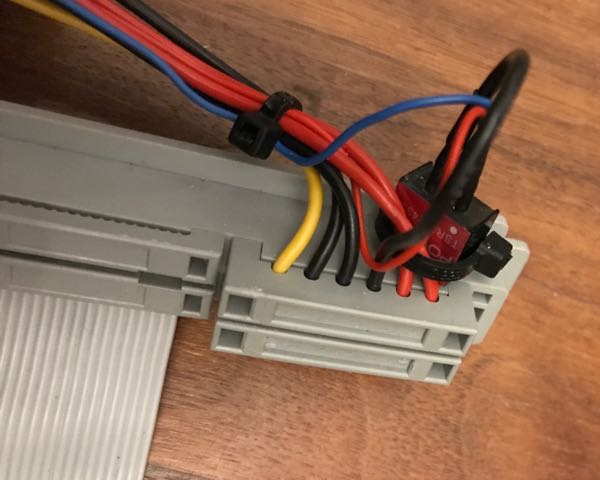
Here you see again the TSR 1-2433 regulator from Traco Power installed on the logic board harness as mentioned before in the Takky section.
When its all mounted and wired it looks like in the picture.
You see that the connecting cables go through the metal plate - I choose this to connect them directly to the logic board. So in this case there is no need to connect them to the main switch.
You see that the connecting cables go through the metal plate - I choose this to connect them directly to the logic board. So in this case there is no need to connect them to the main switch.
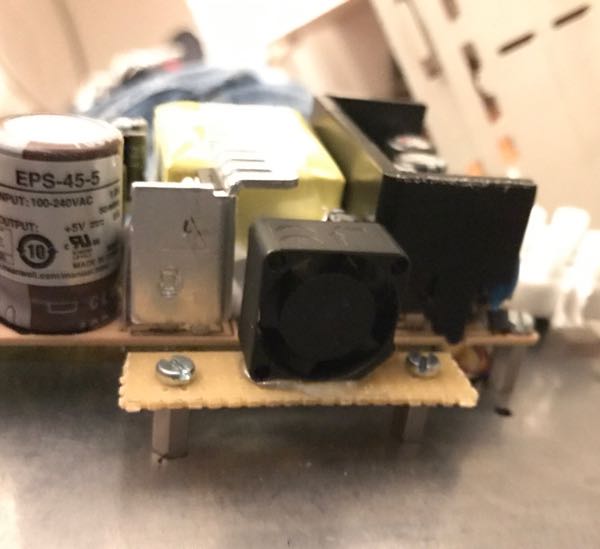
I added a small fan for cooling the additional PSU. Its mounted on a soldering board.
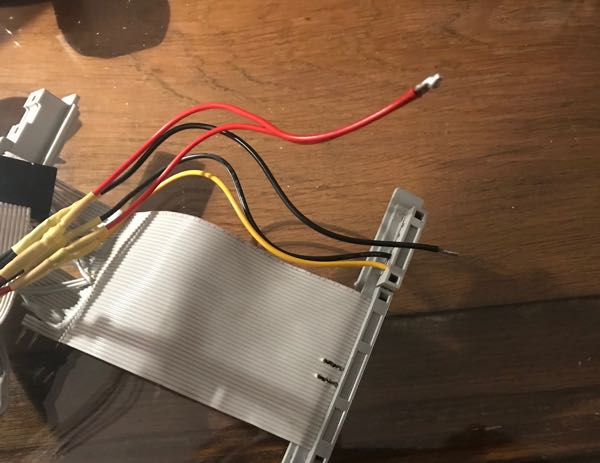
You have to disconnect the both red 5V wires from the analog board connector. I disconnected them and used them to connect to the 5V connector of the added PSU. I put them in that luster terminal - you see on the previous picture.
Now just reassemble the parts and get lucky with your new added power. ;-)