

Takky Upgrade
What you need to do is:
- Calm Hands ;-)
- Dremel(or similar)
- Dremel saw blade
- Ruler
- Marking Pen
- Smal Files
- Pipe Wrench
- Carpet Knife
- Scissors
- A complete wiring harness from one of the possible models below(the following description is based on the 630 harness)
- A donor logic board from one of the possible models below
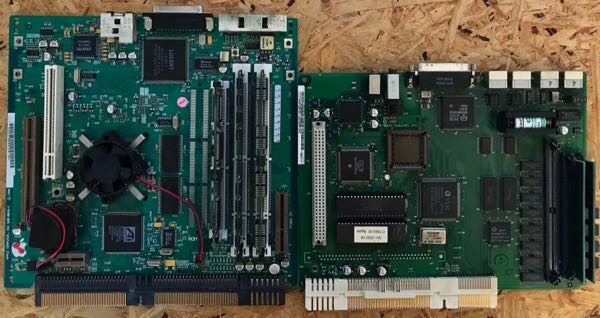
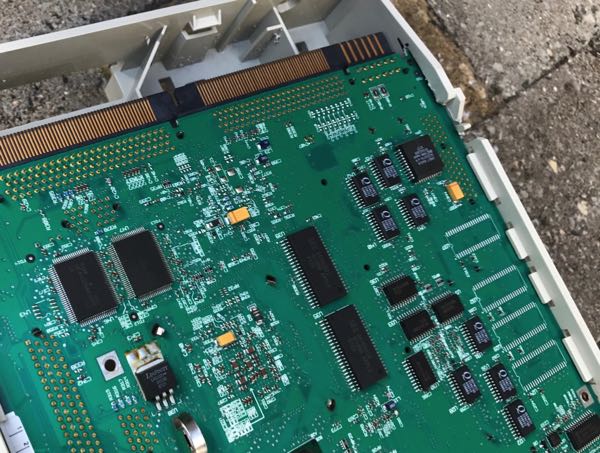
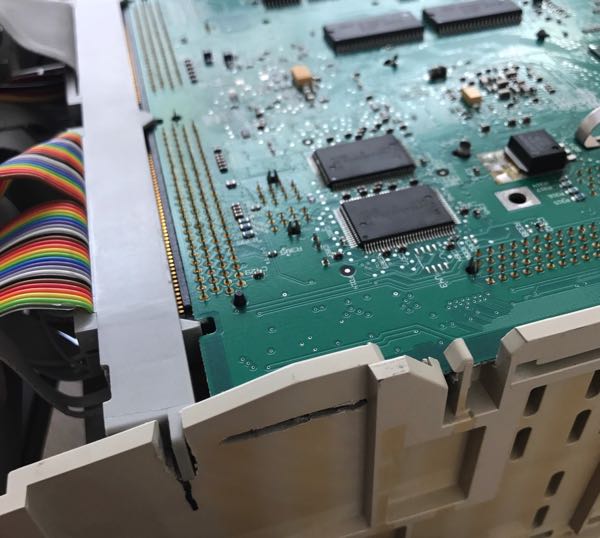
size comparison(left new board, right original board)
For the donor logic board or wiring harness you got the following possibilities(harness and logic board don't have to be from the same model):
640 Series
58x Series
63x Series

- Requires no 3,3V regulator
- 68040 based like a Mystic(No PowerPC)
- Useful for testing
- For this board its not worth to build a Takky
5200/5300 Series
6200/6300 Series
(Exclude 6360)

- Requires no 3,3V regulator
- Poor Board Design
- Gives you PowerPC performance up to 160MHz
- Its possible that an additional PSU is required if energy hungry components are installed
5400 Series
6400 Series
(and 6360)

- Requires 3,3V regulator
- Better board design
- not the best choice; some people got problems to get takky work
- Gives you good PowerPC Performance up to 200MHz
- Its possible that an additional PSU is required if energy hungry components are installed
5500 Series
6500 Series

- May require use of 3.3V regulator if using much more than an L2 cache card and/or a PCI Ethernet card
- Good and stable board design
- Gives you PowerPC performance up to 300MHz
- Fastest logic boards wich are Takky compatible
- Its possible that an additional PSU is required if energy hungry components are installed
Plastic Works
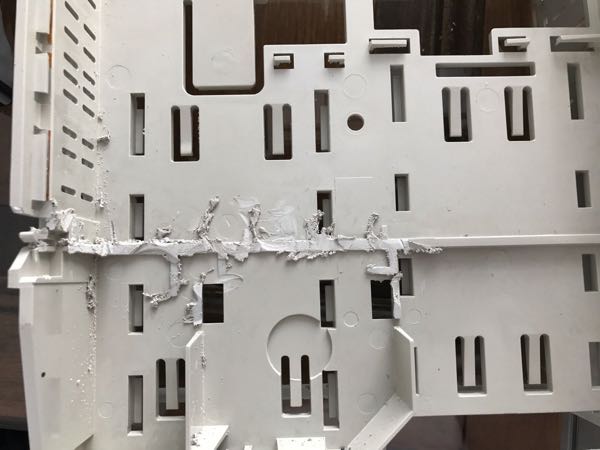
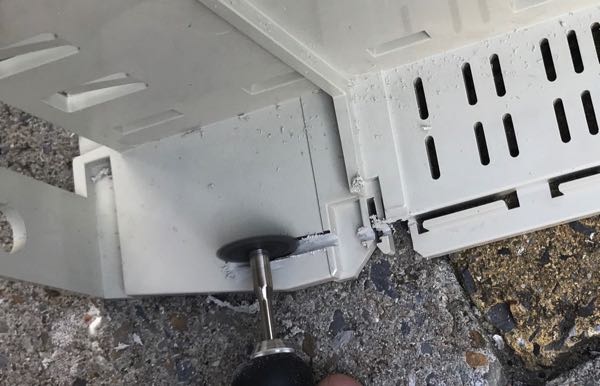
Because the new logic boards have higher constructions(Ram, PCI, Cache Card and so on), you have to cut out the inner plastic constructions with a Dremel.
Extend the slot for the logic board using a Dremel on both sides.
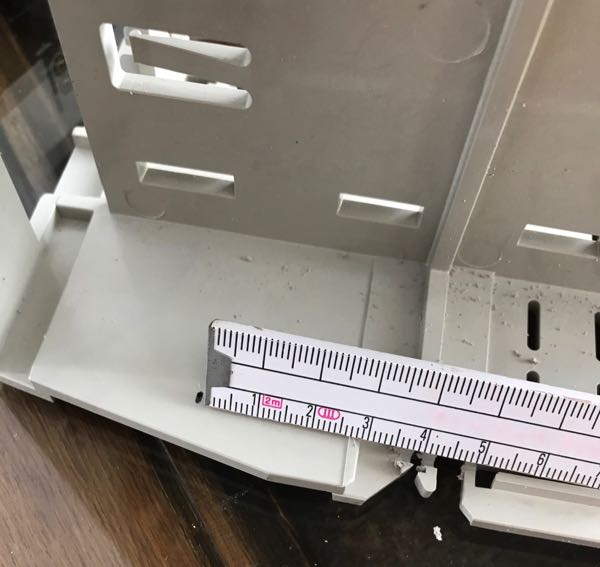
Because the new logic boards are much longer you have to extend the slot 4cm from the shown clip.
Cut with the Dremel a straight line until the first measured point.
You can always try with your new logic board your new created slot.
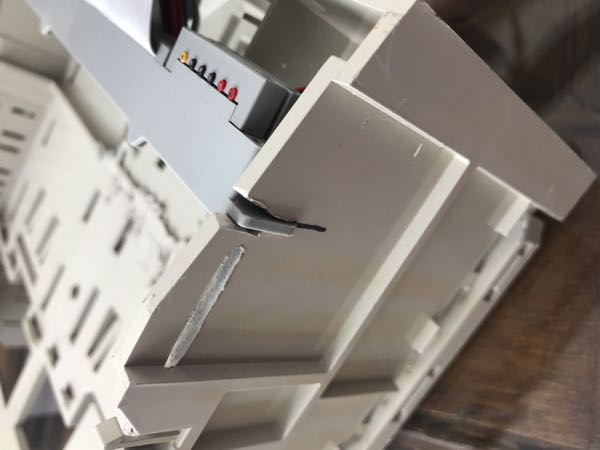
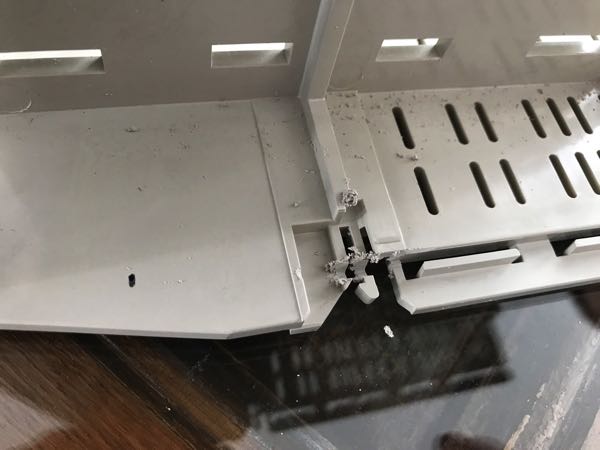
The last thing that you have to do on the plastics is to cut out a slot for the new harness. The Slot has to be cut out at the 4cm line. Just cut out until it fixes with the connector of the new logicboard and the new harness.
If your cutting is done your new logic board should slide in smoothly into the connector of the new harness.
Wiring Works
Your Color Classic Analog Board only accepts the new Logic Board by rewiring the harness. These images show you wich wires you have to reconnect. The Pictures are once created from the CCSCC - the ones you see below are a vectorized remake for a better understanding and they are better scalable.

| 630 Connector | Analog Board Connector | HDD Power Supply Connector | |
|---|---|---|---|
| -12 V input | S1 | 1 | |
| GND | S2 | 2 | |
| ADB Power Supply | S3 | 5 | |
| GND | S4 | 6 | |
| Power off command | S5 | 7 | |
| S6 | |||
| +5 V | S7 | 23 | |
| S8 | |||
| Brightness control output | S9 | 17 | |
| GND | S10 | 18 | |
| Contrast control output | S11 | 19 | |
| -GND | S12 | 10 | |
| Video Signal Output(Blue) | S13 | 11 | |
| GND | S14 | 12 | |
| Video Signal Output(Green) | S15 | 13 | |
| GND | S16 | 14 | |
| Video Signal Output(Red) | S17 | 15 | |
| S18 | |||
| Monitor ID input 2 | S19 Connect to S20 | ||
| Monitor ID input 1 | S20 Connect to S19 | ||
| Monitor ID input 0 | S21 | ||
| GND | S22 | 8 | |
| Composite signal output | S23 | 9 | |
| GND | S24 | ||
| S25 | |||
| GND | S26 | ||
| S27 | |||
| GND | S28 | 29 | |
| Sound output(R) | S29 | 28 | |
| GND | S30 | 31 | |
| Sound output(L) | S31 | 30 | |
| S32 | |||
| Sound amplifier control output | S33 | 37 | |
| S34 | |||
| Microphone input | S35 | 21 | |
| GND | S36 | 22 | |
| S37 | |||
| S38 | |||
| S39 | |||
| S40 | |||
| +12 V | P1-P2(Yellow) | P9(Yellow) | 1(Yellow) |
| GND | P3-P4(Black) | P7(Brown) | 2(Brown or Black) |
| GND | P5-P6(Black) | P5(Black) | 3(Black) |
| P7-P8 | |||
| +5 V | P9-P10(Red) | P3(Red) | 4(Red) |
| +5 V | P11-P12(Red) | P1(Red) | |
Wiring Diagram

- In the diagram and the table at the top the monitor ID is set to VGA (640 x 480 (S19 and S20 connected, S21 unconnected)). In case of HiRes Mod you need to connect S21 to S24(Senseline 0 connected with ground) and leave S19 and S20 unconnected - please see also my page: "640x480".
- A circuit inside the dotted line is for an additional power supply which is only needed for power hungry components like a G3 upgrade card or additional PCI cards. Here you also install the 3,3V regulator if its needed by your logic board. For wiring these have a look at the PSU Upgrade page.
- Please Note that the original wiring diagram from the ccscc has an error in the IDE cabling. This error is corrected in this wiring diagram. Please take in mind that Apple has a different wiring for IDE cables than the industry standard. So if you want to install a longer IDE cable, take a industry standard idea cable and make sure that pin 1 is on pin C50 of the 630 connector. If the length of the IDE cable matches for you, you can leave it as it is(the red cable is in that case on pin 40 of the 630 connector).
Don't forget to cut out "Pin 9" of the Floppy Cable
| 630 Connector | FDD Connector |
|---|---|
| F1 | 1 |
| F2 | 2 |
| F3 | 3 |
| F4 | 4 |
| F5 | 5 |
| F6 | 6 |
| F7 | 7 |
| F8 | 8 |
| F9 | |
| F10 | 10 |
| F11 | 11 |
| F12 | 12 |
| F13 | 13 |
| F14 | 14 |
| F15 | 15 |
| F16 | 16 |
| F17 | 17 |
| F18 | 18 |
| F19 | 19 |
| F20 | 20 |
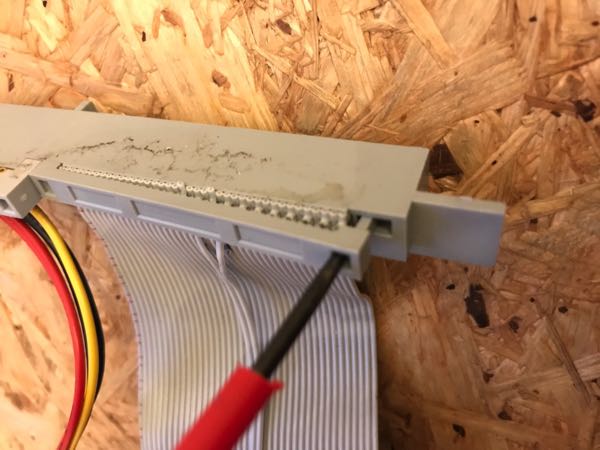
For opening the connectors carefully go into the connector side with a small flat screw driver and open the holder out by pushing slightly to the side.

I do the rewiring on the side of the new harness so I can leave the side of the old logic board connector. That's because the old analog board connector looks a bit fragile.
In other tutorials often a new IDC Cable is used but when you use a new cable you have to reconnect both sides.
In other tutorials often a new IDC Cable is used but when you use a new cable you have to reconnect both sides.
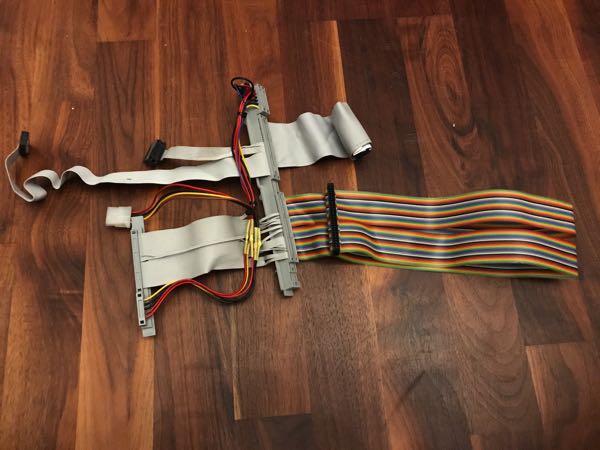
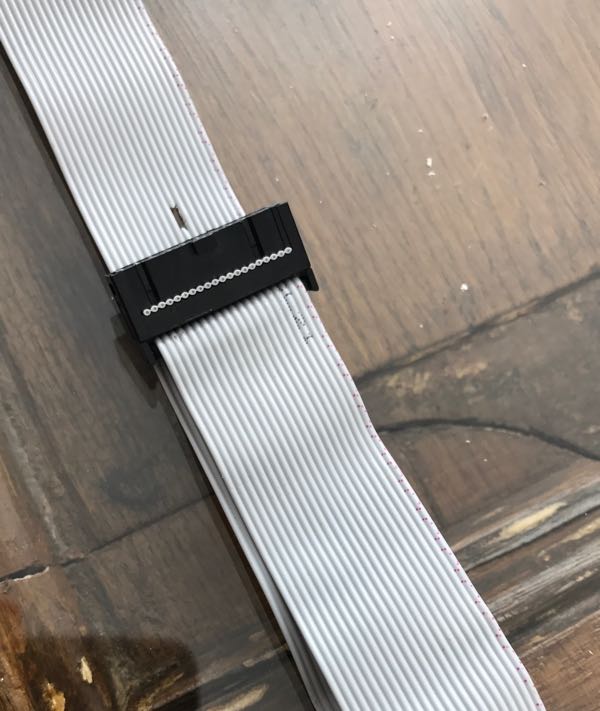
After rewiring the harness looks complete again.
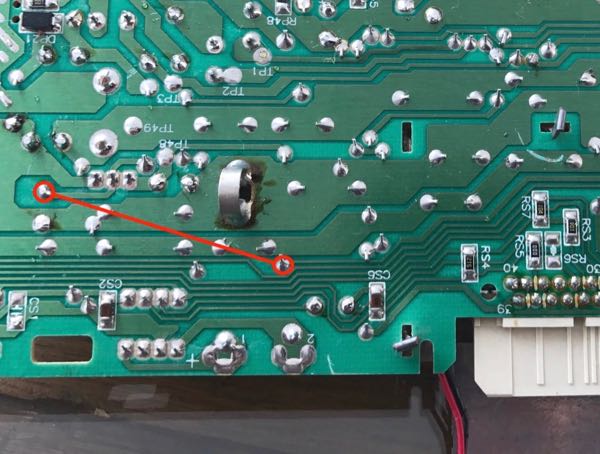
It is necessary to give -10 V instead of -5 V onto one Pin of the analog board. You easily have to connect the shown pins. Without this mod your Takky won't work.
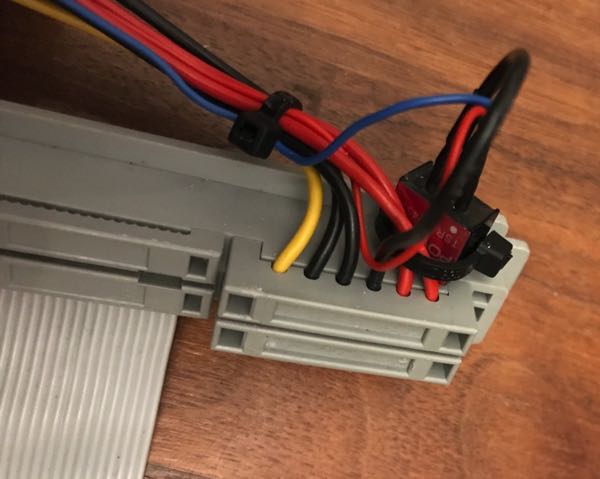
As I mentioned before some logic boards and especially the ones from the 5400 or 6400 series need a 3,3V regulator. In the past, this regulator is built by several electronic components. As time goes by there are now some compact regulators on the market which are very small and integrated. I´ve chosen the TSR 1-2433 from Traco Power. This one works fine in the color classic and gives enough power.
As you see in the left picture the regulator is so small that it can fix on the plastics of the new harness very easy.
To wire it please look at the diagram of the harness wiring. You can install it with the same connectors as the additional PSU.
As you see in the left picture the regulator is so small that it can fix on the plastics of the new harness very easy.
To wire it please look at the diagram of the harness wiring. You can install it with the same connectors as the additional PSU.

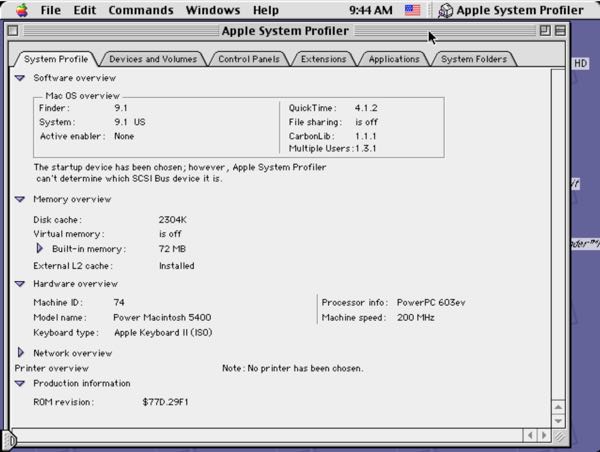
As you see here that it is now possible to install Mac OS 9.1 on the new Takky Color Classic. It has brilliant performance compared to the original color classic.
You see in the Pictures too that a 5400 logic board works pretty well - I don't know why some people got problems with this logic board.
You see in the Pictures too that a 5400 logic board works pretty well - I don't know why some people got problems with this logic board.
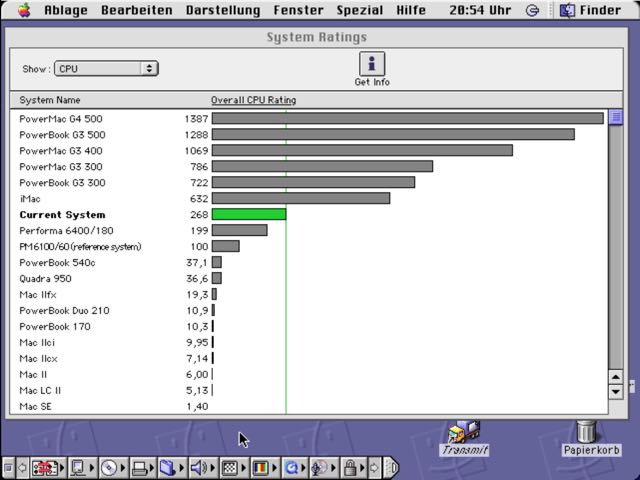
You see here a benchmark of Norton Utilities. The benchmark was done on my Takky with a 6500 logic board 275MHz. The untouched Color Classic is similar to the Mac LC II in the result list.
Have a look on the G3 Upgrade page if you want to see how much the G3 Upgrade increases the speed.
Have a look on the G3 Upgrade page if you want to see how much the G3 Upgrade increases the speed.